Manage your Workspace
The Workspace Settings page is the home for everything that describes the workspace itself: its name, its identifier, who to contact about it. It is also the launchpad for creating additional workspaces and switching between them.
Managers and Admins reach this page from the Administration tab → Workspace Settings. The Administration tab itself is a signpost with one tile per area: Managers see workspace settings, users, triggers and the audit log; Admins additionally the license and server info.
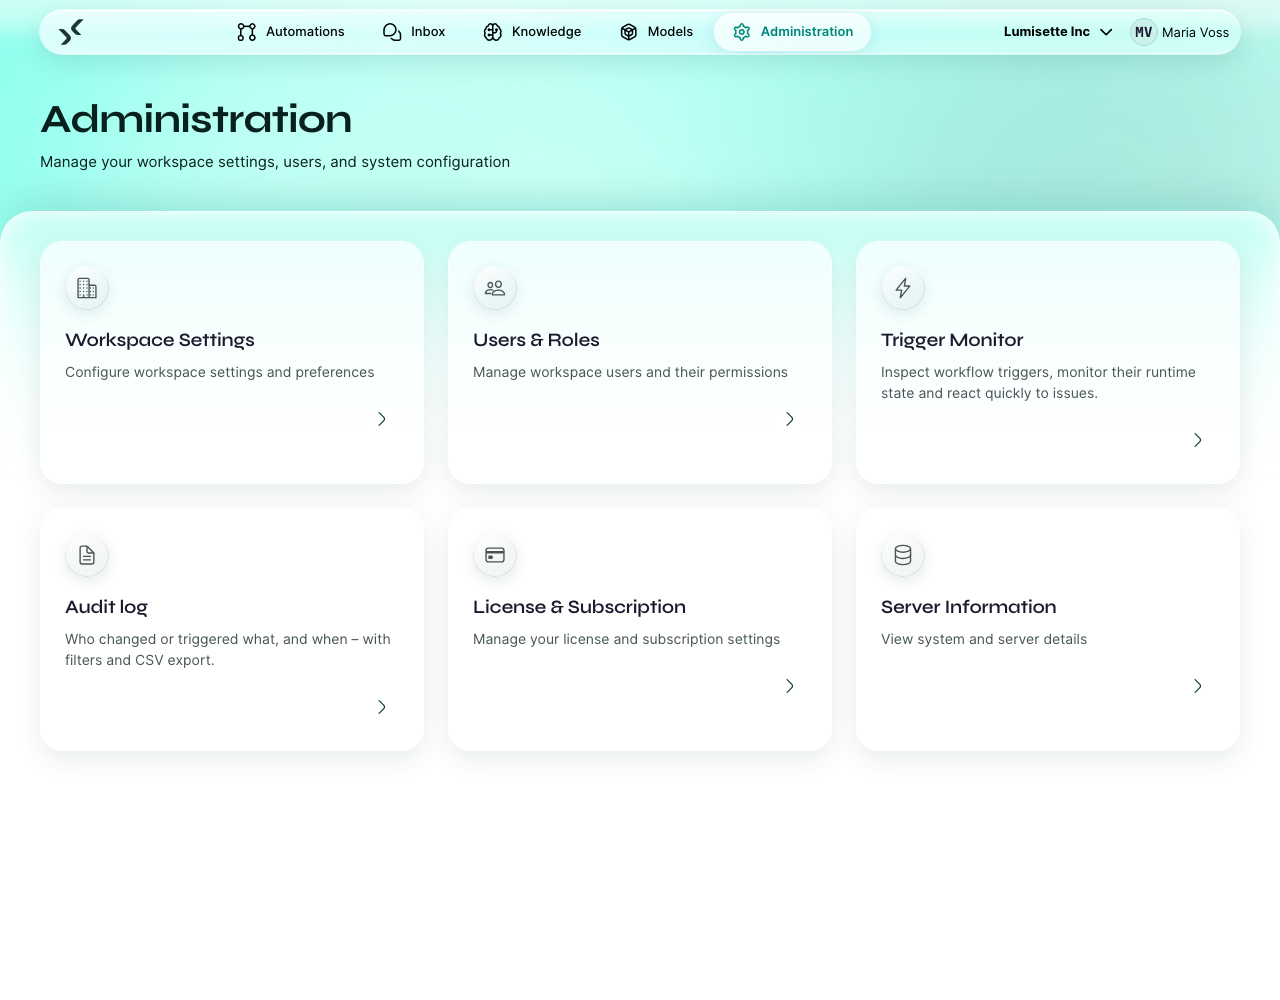
What lives here
| Setting | What it controls | Editable |
|---|---|---|
| Workspace ID | The short technical identifier embedded in URLs, webhook addresses, and exports. | No — chosen once at creation. |
| Display name | What users see in the workspace switcher and the page title. | Yes. |
| Contact e-mail | Address used for license notifications and as the default support contact. | Yes. |
| Number and date format | How numbers and dates appear in files the automations create and in previews — for example 1.234,56 and 24.09.2026 for German (Germany). | Yes. Default: German (Germany). |
| Currency | Currency of currency columns in generated Excel files, and the unit in which the Metrics page shows costs. | Yes. Default: Euro (EUR). |
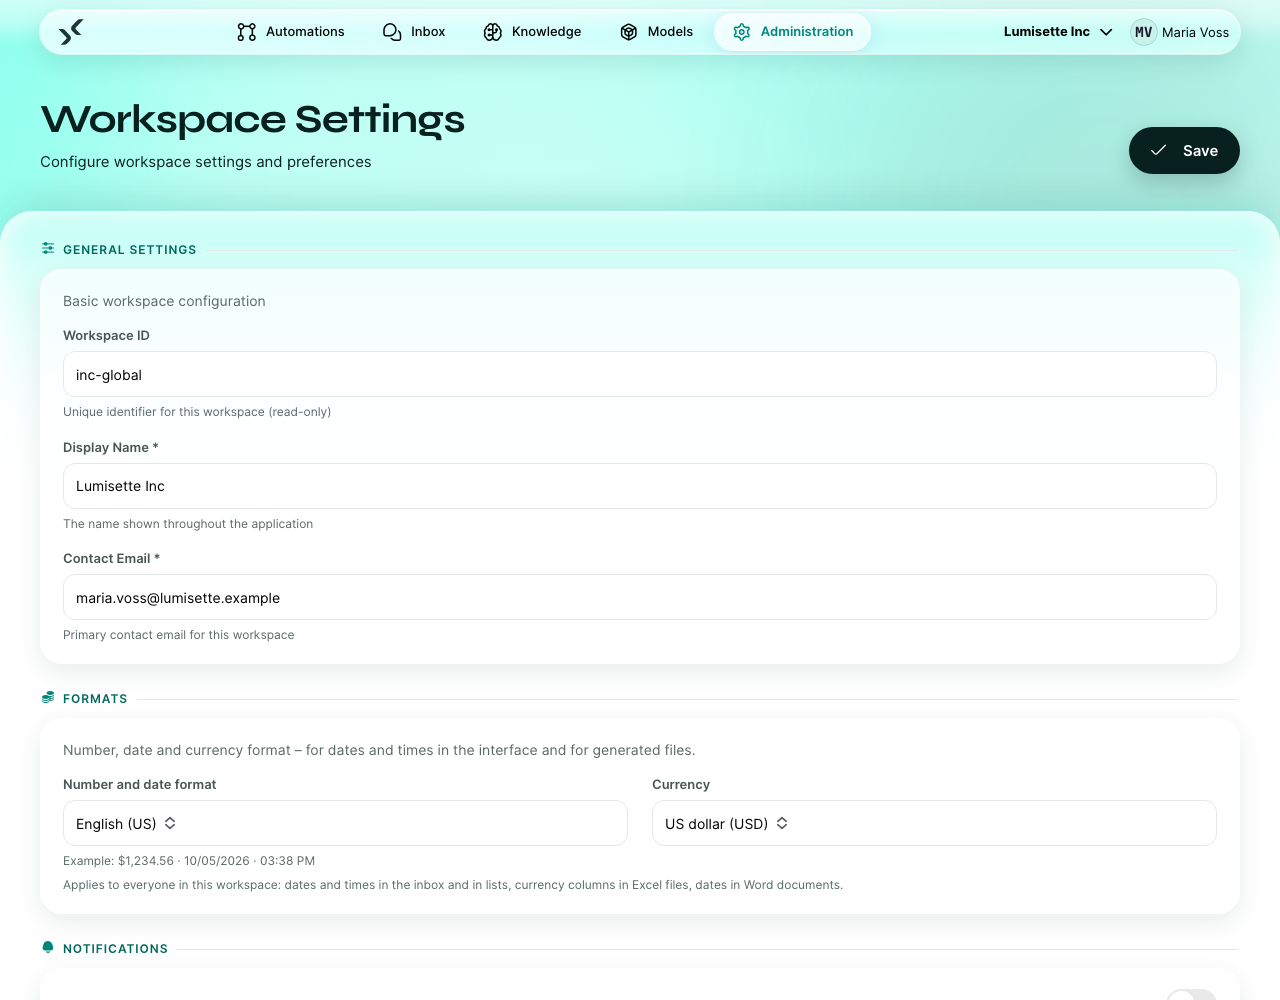
Editing display name or contact e-mail
- Open Administration → Workspace Settings.
- Edit the value in the field.
- Click Save.
The change takes effect immediately. The workspace ID, however, is fixed for the lifetime of the workspace.
Formats: numbers, dates and currency
The Formats section sets how automations of this workspace write numbers, dates and amounts:
- Excel files get currency and date columns in this format: the currency symbol and its position (
CHF 1'234.50,1.234,50 €,$ 1,234.50) and the date order (24.09.2026or09/24/2026). Thousands and decimal separators are shown by Excel according to the regional settings of the computer that opens the file. - Values read from data follow the same format. With German formats,
1,234means 1.234; with English formats it means 1234. - Word documents use the format for the date placeholder and date values.
- Previews of Excel files in the Inbox and on the job page show numbers in this format.
Below the two fields, an example shows the current choice. The setting applies to all automations of the workspace from the next run on; files already created stay as they are.
- Metrics show costs in this currency; the model price fields and the manual cost of an automation are labelled with it.
Nothing is converted. The prices suggested when you pick a model are the providers' list prices in US dollars. If you want to see costs in your own currency, adjust the prices on each model.
Notifications
With Notify admins on failures switched on, every admin of the workspace receives an email whenever a workflow run fails — in addition to the recipients set in the workflow itself. This is a safety net for automations nobody set up notifications for. See Workflows → Email notifications.
E-mail from automations
Two settings for the Send email step in all automations of the workspace:
- Signature — appended below the text of every email (unless the step switches it off). Markdown such as
**bold**or links is formatted. - Allowed recipient domains — separated by comma, e.g.
example.com, partner.com. Emails to other domains are blocked and the step fails with a message naming the address. Subdomains are included (sales.example.com). Drafts are not blocked — a person sends them. Leave the field empty for no restriction.
Why the workspace ID cannot change
The ID is woven into several places that would break if it changed:
- Webhook URLs that external systems may have stored.
- Job and memory paths on the AI Kit server's filesystem.
- Exported automation files that reference the workspace.
If the ID really must change, the supported route is: create a new workspace with the desired ID, export automations from the old one, import them into the new one, redirect webhooks, and retire the old workspace. Not difficult, but deliberate.
Multiple workspaces
A single AI Kit installation can host many workspaces, subject to the Workspaces quota in your license (see Licensing). Each workspace is fully isolated — its own users, models, knowledges, automations, jobs.
Reasons to use multiple workspaces:
- Departmental separation. Each business unit owns its own automations and data.
- Customer separation. Agencies and consultancies often run one workspace per client.
- Production vs. staging. Some teams use one workspace for live automations and another for testing.
Creating a new workspace
If you are Admin in at least one workspace, the top-of-screen workspace picker has a New workspace option. No other role creates workspaces: whoever creates one becomes its Admin — this keeps it clear who can install licenses. The very first workspace is created by the first user during setup. The flow is the same as the very first workspace you created at setup time: pick an ID, a display name, a contact e-mail, save.
Switching workspaces
Click the current workspace name in the top toolbar. A dropdown lists every workspace you belong to. Pick one to switch.
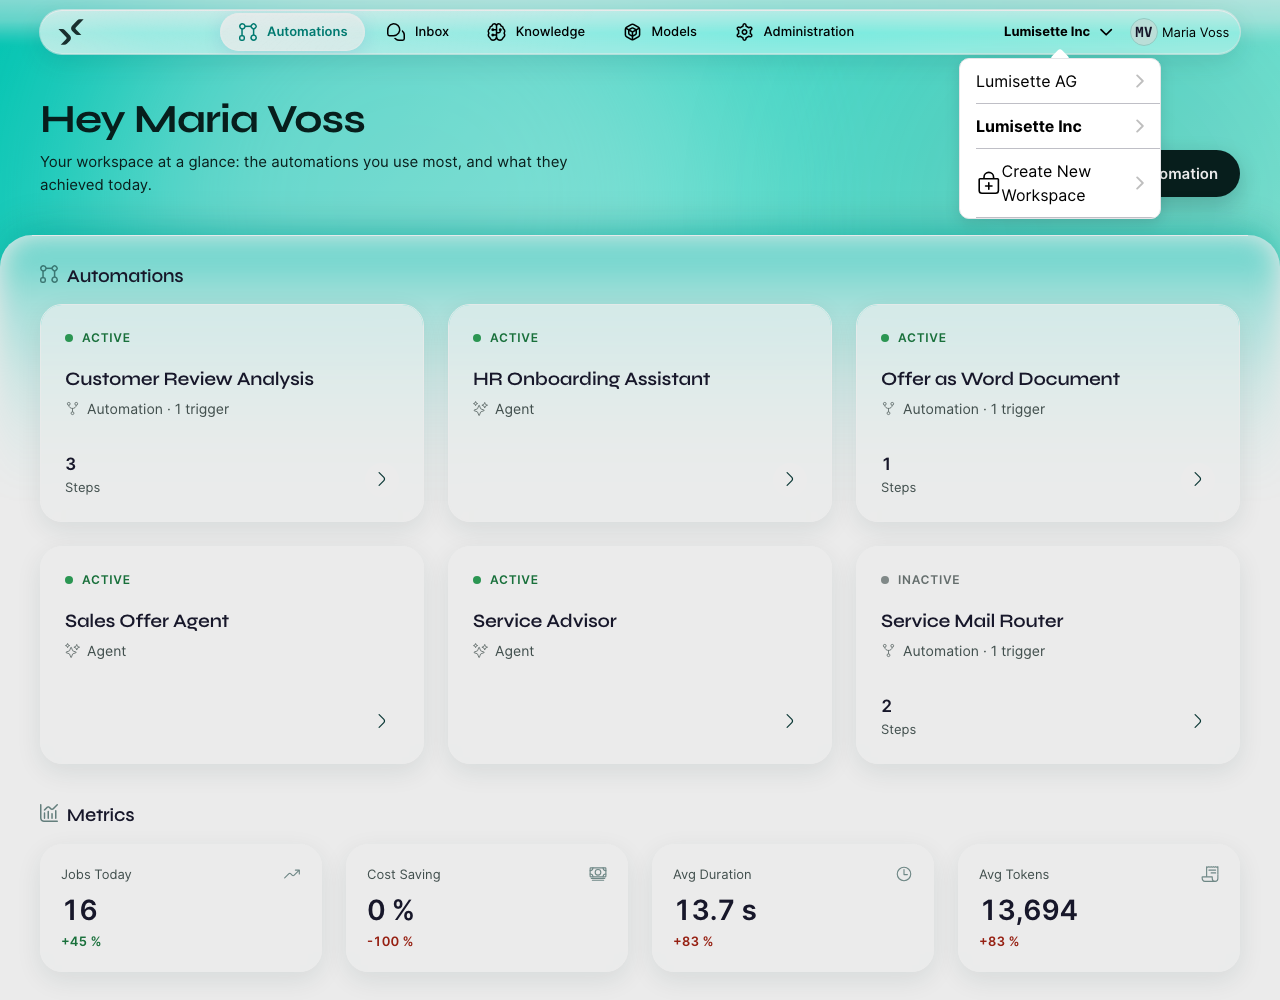
Each user can belong to many workspaces with potentially different roles in each.
Recommendations
- ✅ Keep the display name short and unique. People glance at the workspace switcher many times a day.
- ✅ Use a monitored contact e-mail. License notifications and important system messages go there.
- ✅ When you create a new workspace, decide deliberately whether to invite the same admin team or different admins.
- ⚠️ Workspaces share the same physical AI Kit installation. If the server is down, all workspaces are down.
- ❌ Do not use the workspace ID for sensitive information. It appears in URLs and is visible to anyone who can log in.
What to do next
- Manage Users — invite people into the workspace.
- Licensing — quotas and license management.