Create and Edit Knowledge Bases
This page walks you through building a knowledge from scratch and editing one later.
Before you start
- You have at least one embedding model configured in the workspace — without one the create form cannot be completed. See Models → Introduction.
- You know what content you want the knowledge to hold and where it lives (a set of files to upload, a few inline snippets, …).
- You have Editor, Manager, or Admin rights in the workspace.
Step by step — create a knowledge
The create form asks for the minimum: name, description, embedding model, and one data source. Everything else — refresh schedule, further sources, files, retrieval tuning — happens afterwards in the editor.
1. Open the Knowledge tab and click Create
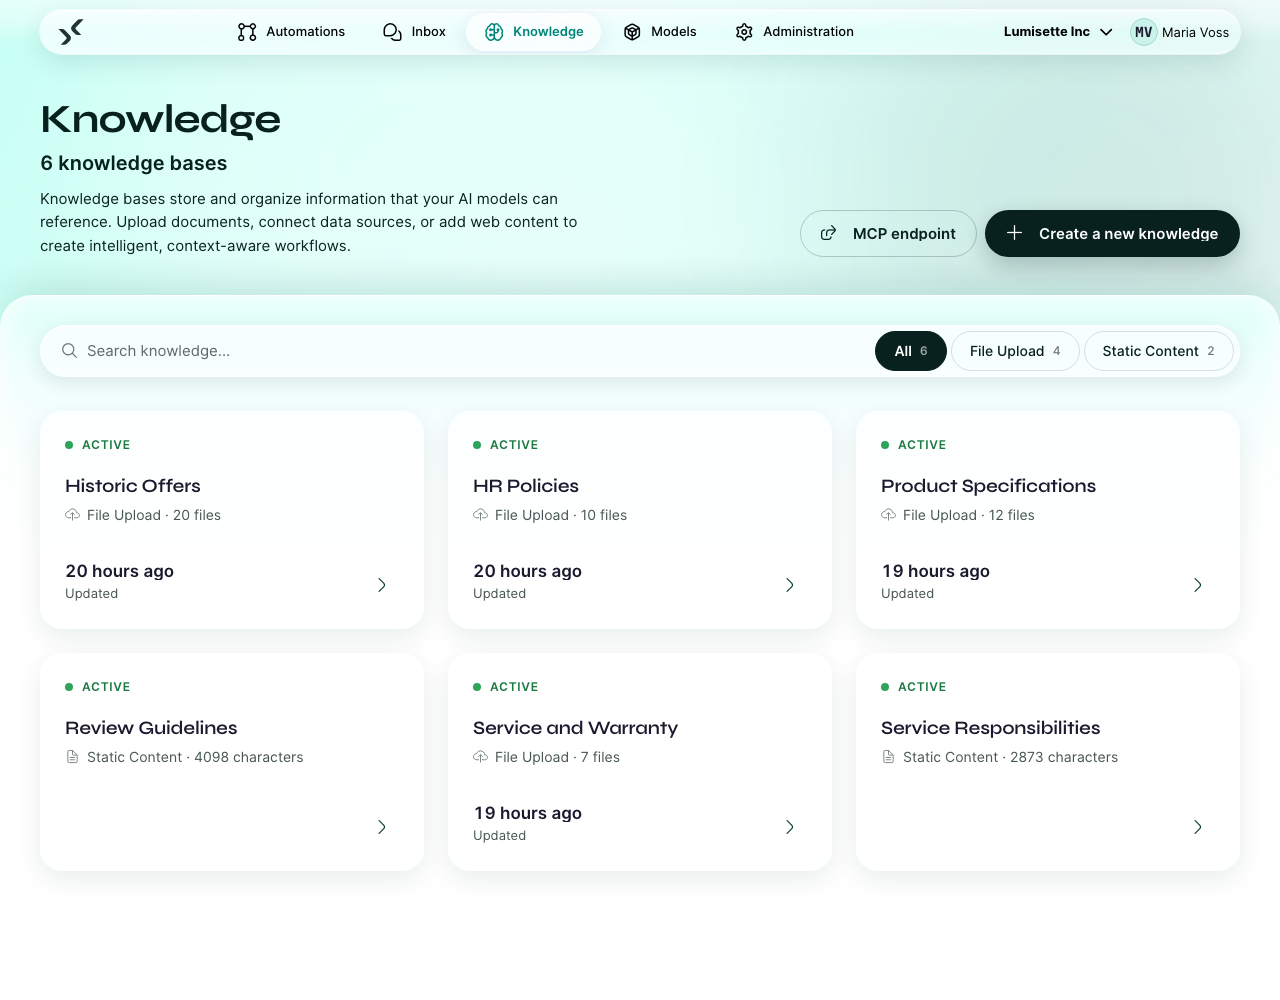
2. Give it a name and description
Under Knowledge Details:
- Name — short and specific: "HR Handbook", "Product FAQ".
- Description — a sentence explaining what the knowledge contains. This is shown to agents that have the knowledge connected, so they understand when to use it.
3. Pick the embedding model
Embedding Model lists the embedding-enabled models in the workspace. The embedding model translates documents and queries into the same numeric space so they can be compared.
Important: once you pick an embedding model and add data, you cannot easily switch. Changing the model invalidates every chunk you have indexed. Pick deliberately — and pick the same model for knowledges you want to keep comparable.
4. Choose the data source
Under Data Source you pick one connector. What you choose decides which fields appear underneath it:
- File Upload — no configuration at all. The form says so: files are uploaded after the knowledge exists, in the editor. This is the simplest start.
- Static Content — a Content field you fill in right here. Good for FAQ-style text that does not warrant a separate document.
- Web Content — a Start URL, plus Crawl Depth and Max Pages.
- Local Filesystem — a Source Path, a File Pattern (Glob) and Include subfolders. With subfolders, a pattern containing
/applies to the relative path (e.g.contracts/**/*.pdf), otherwise to the file name. Only offered when the installation permits local resources. - Database — a live SQL source. Technically a different kind of knowledge (queried live instead of indexed), but you choose it here like any other source.
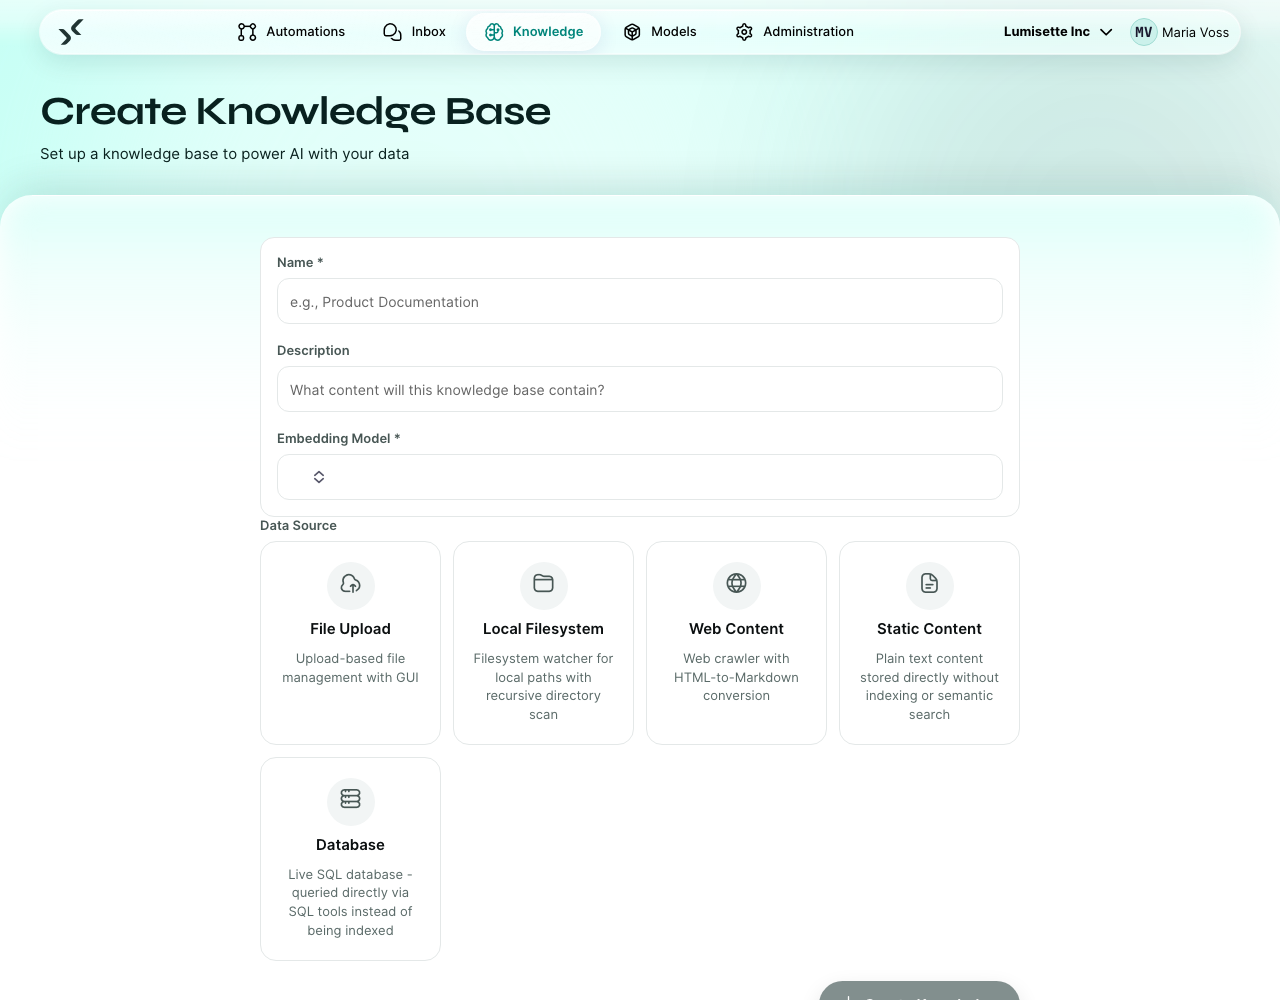
5. Click Create Knowledge
The button stays disabled until name, model, and the source's own required fields are filled. You land in the editor.
6. Add content and run the first refresh
In the editor you now do what the create form deliberately left out:
- For File Upload: drag your documents in (PDF, Word, Excel, Text, RTF, Markdown).
- Set Automatic Refresh if the source should re-read itself on a schedule (see below).
- Click Refresh to run the initial indexing. The first refresh can take a while — minutes for small knowledges, longer for big ones. Watch the Jobs view for progress.
📷 SCREENSHOT: The knowledge editor right after the first refresh, showing the status and the chunk count.
The refresh schedule
Automatic Refresh in the editor controls how the knowledge re-reads its sources:
- Manual / On Change — no schedule. The knowledge refreshes when you trigger it and, for uploaded files and folders on the server, automatically 30 seconds after files were added, changed or deleted. Web pages are only refreshed manually.
- Every 2 / 4 / 6 / 12 hours — fixed intervals through the day.
- Daily, Every night at 00:00 / 02:00 / 04:00, Every 2 days, Once per week (Sunday) — for content that changes rarely. The night options are the ones to reach for when indexing should not compete with daytime use.
You can change this at any time. Manual / On Change is a good starting point while you are testing — short intervals consume embedding tokens.
Editing an existing knowledge
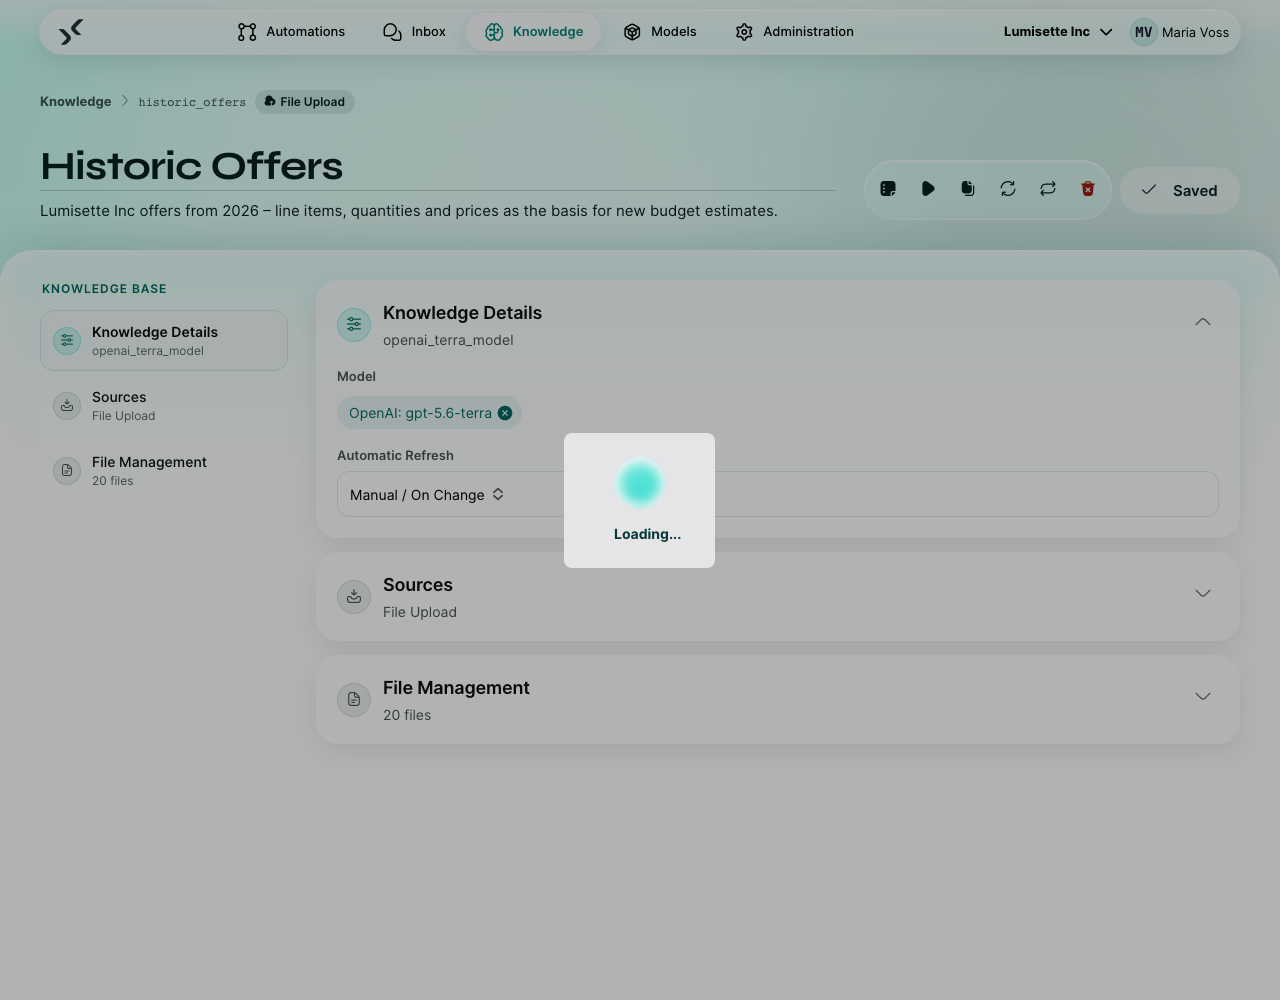
Click any knowledge card in the Knowledge tab to open the editor. From there you can:
- Rename, edit the description, change the automatic refresh.
- Configure the source, and upload or remove files.
- Trigger a manual refresh.
- Open the Jobs view to inspect past refreshes.
- Test a query — type a question and see which chunks come back. Use this to spot obviously wrong matches.
- Duplicate the knowledge — useful if you want to fork a configuration to a related topic.
- Delete the knowledge.
Testing a knowledge
Knowledge testing is the single most useful debugging tool. Type a question, get the top matches, and look at them:
- If the matches are clearly off-topic, the embedding model or the chunking is wrong.
- If the matches look right but the AI's answer is wrong, the prompt or the model is the issue.
Test before you give the knowledge to an automation in production.
Recommendations
- ✅ Start with File Upload or Static Content if you just want to see the mechanism work — neither needs anything outside the platform.
- ✅ Use the Test function with five to ten realistic queries before connecting a knowledge to production automations.
- ✅ Keep the description accurate. Agents use it to decide when to consult the knowledge.
- ✅ Group content by topic, not by file type. A knowledge with five Word documents and three web pages on the same topic is fine; a knowledge with mixed topics is not.
- ⚠️ With a schedule, uploaded or changed files are picked up at the next scheduled time, not immediately. Manual / On Change picks them up after 30 seconds.
- ⚠️ Changing the embedding model invalidates everything. Plan such a change as a "create new knowledge, repoint automations, delete the old one" sequence.
- ❌ Do not dump unrelated content into one knowledge to "save quotas". Search quality drops fast as content diversity grows.
What to do next
- Keep your knowledge current: Refresh Knowledge Data.
- Connect knowledge to automations: Knowledge Query and AI action.